Axkva Min Instance: Difference between revisions
No edit summary |
(→Loot) |
||
| (37 intermediate revisions by the same user not shown) | |||
| Line 1: | Line 1: | ||
{{Instance | |||
|image = [[File:Banishment Chamber.jpg|thumb]] | |||
|parameter-1 = 5 | |||
|parameter-2 = None | |||
|parameter-3 = 40m | |||
|parameter-4 = [[Dathomir]] | |||
|parameter-5 = -3915, 80 | |||
}} | |||
[[File: | [[File:Cloaked figure.png|thumb|Cloaked Figure]] | ||
[[ | [[File:Aphra.png|thumb|Dr. Chelli Lona Aphra]] | ||
[[File:Luke questgiver.png|thumb|Luke Skywalker]] | |||
[[File:Gorvo.jpg|thumb|Gorvo the rancor]] | |||
[[File:Lelli Hi.jpg|thumb|Lelli Hi]] | |||
[[File:Kimaru.jpg|thumb|Kimaru the Nightsister]] | |||
[[File:Axkva Min.jpg|thumb|Axkva Min]] | |||
== Description == | |||
Once again, an Empire in Flames takes content from Star Wars Galaxies and puts its own unique spin on it. | |||
It’s time to begin your journey into the instance and defeat the [[Nightsister]] threat. This instance has a timer of 40 minutes and players will be locked out until server reset the next day. | |||
== Prerequisite Quest == | |||
In order to begin the [[Axkva Min Instance|Axkva Min instance]] a player needs to complete the prerequisite quest once per character. | |||
=== Imperial === | |||
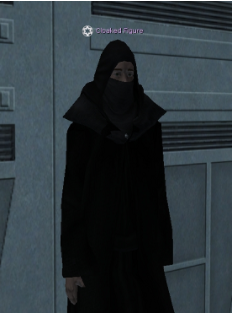
Imperial Players will need to speak with a Cloaked Figure on the Imperial Star Destroyer on [[Kuat]]. | |||
Access to the ISD can be found at /way 4493 5449 | |||
His specific waypoint is /way 3814 4922 | |||
=== Neutral === | |||
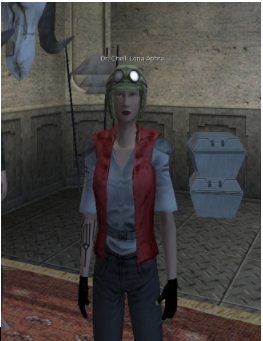
Neutral Players will need to speak with Dr. [[Chelli Lona Aphra]] in [[Mos Eisley]], [[Tatooine]]. | |||
She can be found inside a guildhall at /way 3480 -4684 | |||
Her specific waypoint is /way 3475 -4665 | |||
=== New Republic === | |||
New Republic players will need to speak with [[Luke Skywalker]] in the Senate Building on [[Hanna City]], [[Chandrila]]. | |||
Senate Building can be found at /way 500 -2935 | |||
His specific waypoint is /way 520 -2915 | |||
=== Final Step === | |||
The quest giver instructs you to travel to [[Dathomir]]. With a group in hand [5], make your way down the Nightsister Stronghold POI Cave. At the bottom you find the prison door. Make your way inside when all parties are ready, as you will only have 40 minutes once inside. Additionally if the entire party wipes, the instance is over. At the time of writing this guide store your pets prior to entering the instance. Only 1 person needs to access the door. | |||
The Chamber Door can be found at /way -3915 80 | |||
== Encounters == | |||
== | === Nandina and Gorvo === | ||
''' | Nightsister Witch '''Nandina''', and her pet Rancor '''Gorvo''' are already spawned in the back of the Chamber when you enter. The two share a buff which allows Nandina to heal Gorvo for a massive amount of health so it is imperative to split the two up and get Gorvo out of range of Nandina's heal. | ||
Split the two up and kill Nandina first. Once Nandina is down kill Gorvo. When both are dead return your group to the edge of the bridge and prepare for the next boss. | |||
=== Lelli Hi === | |||
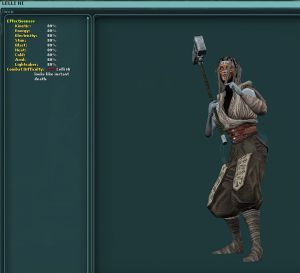
With this boss, and the next, it's important to keep on the move as much as possible. '''Lelli Hi''' will occasionally spawn in mines which look like large, white mushrooms that do large amounts of damage to players. Keep moving and stay out of range of the mines' AoE. | |||
=== Kimaru === | |||
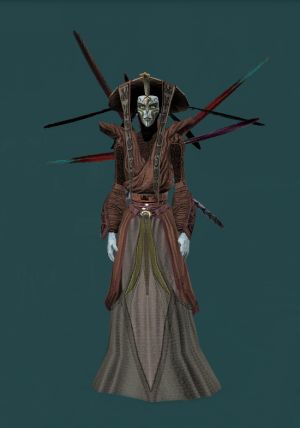
'''Kimaru''' spawns long-lasting rings of fire and small force lightning storms which persist on the ground. As with the last fight it's important to stay on the move and dodge the lightning and fire. Being hit by one alone will not cause much trouble but if you get hit with both it's almost instant death. | |||
=== Suin Chalo === | |||
'''Suin Chalo''' spawns low-health minions who are only vulnerable to certain element types. | |||
' | It's important to designate one player as a dedicated weapon-switcher to deal with the adds during this fight while the rest of the party focuses on Suin. | ||
''' | The minions and their respective vulnerabilities are: | ||
*'''Doum''' - <font color="#ffa500">'''Heat Damage'''</font> | |||
*'''Ekomal''' - <font color="#008080">'''Cold Damage'''</font> | |||
*'''Hur'dem''' - <font color="#008000">'''Acid Damage'''</font> | |||
*'''Oxvul''' - <font color="#0000ff">'''Electricity Damage'''</font> | |||
[[Axkva Min | === [[Axkva Min]] === | ||
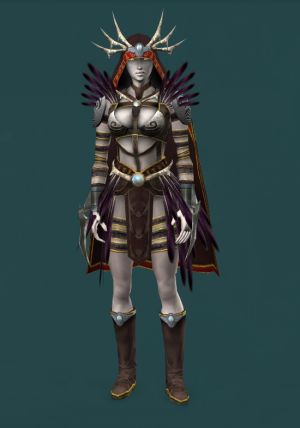
' | [[Axkva Min]] is the final boss and will escape from her crystal at the rear of the chamber where she will remain until someone aggros her. It's best for the group to stack up close on each other and next to her for the engagement and attack with AoEs as she will occasionally encase a player in a crystal which will consume the player's health and heal Axkva. The crystals themselves have very few hitpoints but must be dealt with very quickly. | ||
'' | |||
[[Category: | Axkva has a considerable amount of health so it's important to have swiftly moved through the previous stages in order to ensure enough time is left in the instance to complete this fight. | ||
== Loot == | |||
{{Lootwip}} | |||
* '''[[Heroic Coins|Hand-struck Coin]] (guaranteed)''' | |||
* Axkva Min Claw Lamp | |||
* Hanging Banner: The Crone | |||
* Great Hyperspace War Bas-Reilief | |||
* Large Indoor Garden | |||
* Painting: Augwyn | |||
* Painting: Lurrexu | |||
* Painting: Kyrisa | |||
* Painting: Morathax | |||
* Painting: Mutant Rancor | |||
* Painting: Nightsister Lightwhip | |||
* Painting: Nightsister Lorekeeper | |||
* Painting: Nightsister Sentry | |||
* Painting: Nightsister Spell Weaver | |||
* Painting: Singing Mountain Councilwoman | |||
* Painting: Singing Mountain Initiate | |||
* Painting: Singing Mountain Rancor | |||
* Painting: Singing Mountain Tyro | |||
* Painting: Singing Mountain | |||
* Painting: Spiderclan Acolyte | |||
* Painting: Watching the Witches | |||
* Schematic: Armored Soul Guard | |||
* Schematic: [[Nightsister Energy Lance]] | |||
* Schematic: [[Nightsister Energy Scythe]] | |||
* Schematic: [[Nightsister Energy Sword]] | |||
* Schematic: Shrouded Helmet | |||
* Schematic: Witch Mask | |||
* Small Indoor Garden | |||
== External Links == | |||
# [https://www.empireinflames.com/?p=1177 Friday Feature: Axkva Min! An EiF Spin!] | |||
[[Category:Guide]] | |||
[[Category:Heroic]] | |||
[[Category:Instance]] | |||
Latest revision as of 22:21, 1 January 2024
Description[edit | edit source]
Once again, an Empire in Flames takes content from Star Wars Galaxies and puts its own unique spin on it.
It’s time to begin your journey into the instance and defeat the Nightsister threat. This instance has a timer of 40 minutes and players will be locked out until server reset the next day.
Prerequisite Quest[edit | edit source]
In order to begin the Axkva Min instance a player needs to complete the prerequisite quest once per character.
Imperial[edit | edit source]
Imperial Players will need to speak with a Cloaked Figure on the Imperial Star Destroyer on Kuat.
Access to the ISD can be found at /way 4493 5449
His specific waypoint is /way 3814 4922
Neutral[edit | edit source]
Neutral Players will need to speak with Dr. Chelli Lona Aphra in Mos Eisley, Tatooine.
She can be found inside a guildhall at /way 3480 -4684
Her specific waypoint is /way 3475 -4665
New Republic[edit | edit source]
New Republic players will need to speak with Luke Skywalker in the Senate Building on Hanna City, Chandrila.
Senate Building can be found at /way 500 -2935
His specific waypoint is /way 520 -2915
Final Step[edit | edit source]
The quest giver instructs you to travel to Dathomir. With a group in hand [5], make your way down the Nightsister Stronghold POI Cave. At the bottom you find the prison door. Make your way inside when all parties are ready, as you will only have 40 minutes once inside. Additionally if the entire party wipes, the instance is over. At the time of writing this guide store your pets prior to entering the instance. Only 1 person needs to access the door.
The Chamber Door can be found at /way -3915 80
Encounters[edit | edit source]
Nandina and Gorvo[edit | edit source]
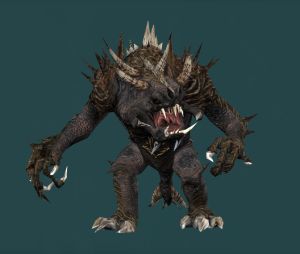
Nightsister Witch Nandina, and her pet Rancor Gorvo are already spawned in the back of the Chamber when you enter. The two share a buff which allows Nandina to heal Gorvo for a massive amount of health so it is imperative to split the two up and get Gorvo out of range of Nandina's heal.
Split the two up and kill Nandina first. Once Nandina is down kill Gorvo. When both are dead return your group to the edge of the bridge and prepare for the next boss.
Lelli Hi[edit | edit source]
With this boss, and the next, it's important to keep on the move as much as possible. Lelli Hi will occasionally spawn in mines which look like large, white mushrooms that do large amounts of damage to players. Keep moving and stay out of range of the mines' AoE.
Kimaru[edit | edit source]
Kimaru spawns long-lasting rings of fire and small force lightning storms which persist on the ground. As with the last fight it's important to stay on the move and dodge the lightning and fire. Being hit by one alone will not cause much trouble but if you get hit with both it's almost instant death.
Suin Chalo[edit | edit source]
Suin Chalo spawns low-health minions who are only vulnerable to certain element types.
It's important to designate one player as a dedicated weapon-switcher to deal with the adds during this fight while the rest of the party focuses on Suin.
The minions and their respective vulnerabilities are:
- Doum - Heat Damage
- Ekomal - Cold Damage
- Hur'dem - Acid Damage
- Oxvul - Electricity Damage
Axkva Min[edit | edit source]
Axkva Min is the final boss and will escape from her crystal at the rear of the chamber where she will remain until someone aggros her. It's best for the group to stack up close on each other and next to her for the engagement and attack with AoEs as she will occasionally encase a player in a crystal which will consume the player's health and heal Axkva. The crystals themselves have very few hitpoints but must be dealt with very quickly.
Axkva has a considerable amount of health so it's important to have swiftly moved through the previous stages in order to ensure enough time is left in the instance to complete this fight.
Loot[edit | edit source]
This loot list is incomplete and currently a work-in-progress. You can help Star Wars Galaxies: Empire in Flames by expanding it.
- Hand-struck Coin (guaranteed)
- Axkva Min Claw Lamp
- Hanging Banner: The Crone
- Great Hyperspace War Bas-Reilief
- Large Indoor Garden
- Painting: Augwyn
- Painting: Lurrexu
- Painting: Kyrisa
- Painting: Morathax
- Painting: Mutant Rancor
- Painting: Nightsister Lightwhip
- Painting: Nightsister Lorekeeper
- Painting: Nightsister Sentry
- Painting: Nightsister Spell Weaver
- Painting: Singing Mountain Councilwoman
- Painting: Singing Mountain Initiate
- Painting: Singing Mountain Rancor
- Painting: Singing Mountain Tyro
- Painting: Singing Mountain
- Painting: Spiderclan Acolyte
- Painting: Watching the Witches
- Schematic: Armored Soul Guard
- Schematic: Nightsister Energy Lance
- Schematic: Nightsister Energy Scythe
- Schematic: Nightsister Energy Sword
- Schematic: Shrouded Helmet
- Schematic: Witch Mask
- Small Indoor Garden
